Wine red can look sharply polished, soft and matte, or almost translucent. These ten distinct designs change the shape, length, finish, or pattern—not just the styling around the hand. Compare the pictures, then save the details you want to repeat.
The images are original AI concepts, not photographs of salon work. Colors and special-effect finishes vary with lighting; use a real swatch to choose the final shade.
01. Glossy wine red almond nails
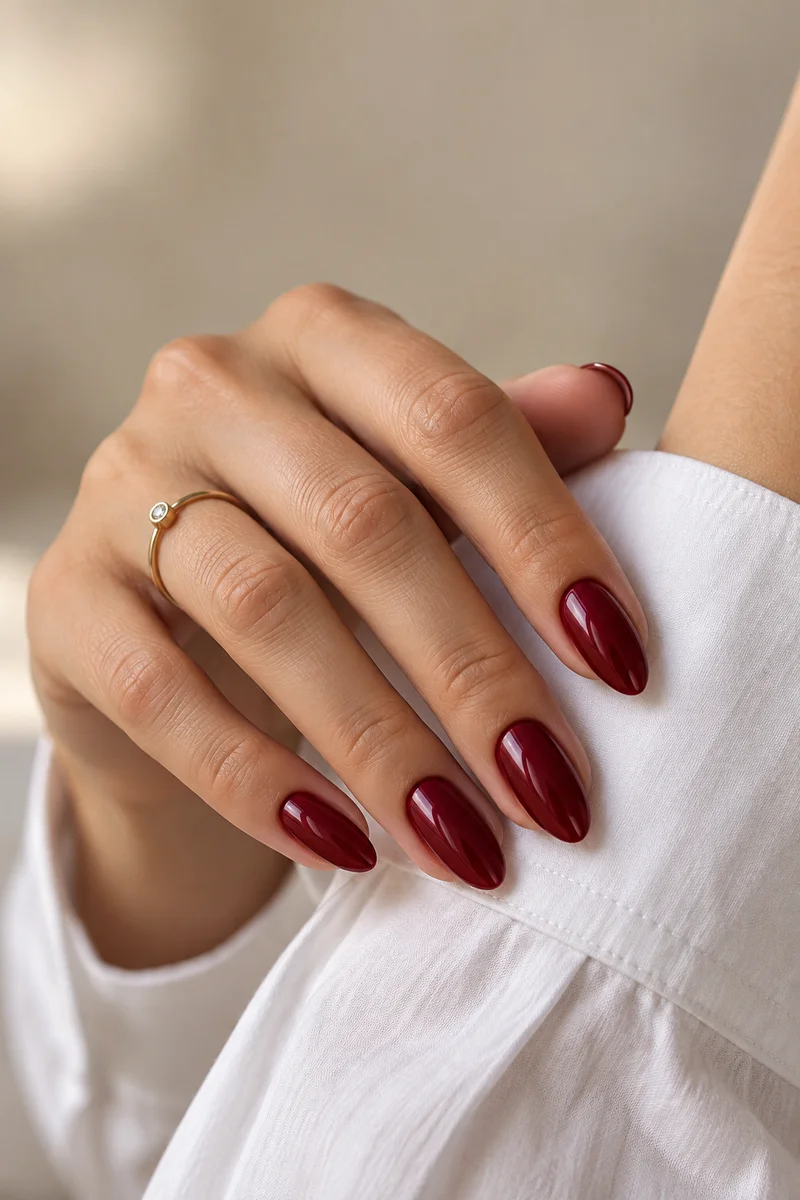
The design. Opaque deep wine on every nail, with a medium almond shape and clear glossy reflections. The taper makes this a different silhouette from the short soft square in idea six.
Wear it with. A crisp shirt or an evening outfit lets the uninterrupted color stand out. This is the simplest choice here if you want a rich manicure without a pattern.
Ask for. Specify the length, a softly rounded almond point, and a wine shade that stays visibly red in daylight. Compare a brown-leaning and a plum-leaning swatch before choosing; the bottle name alone will not tell you the difference.
02. A fine wine red French tip
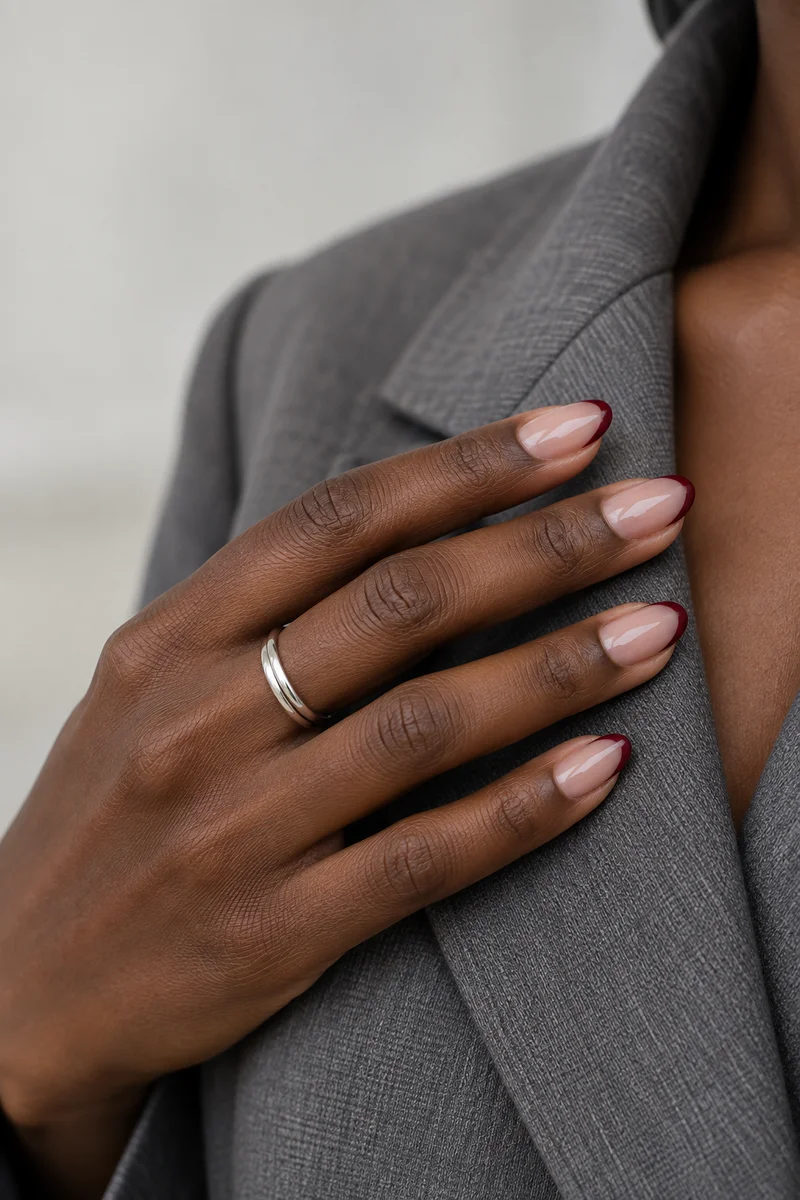
The design. A translucent neutral base covers most of each nail; a fine burgundy band traces the tip. Unlike the full-color classic, the open area is part of the design.
Wear it with. Try this when you want a small red detail alongside tailoring or everyday neutrals. A slim tip carries the color without the visual weight of a fully opaque set.
Ask for. Request a narrow curved edge and a base that looks sheer against your skin. Keep the band proportional to the nail: shorter nails need a finer line. Show the preferred shape as well as the tip color so the result is not accidentally much longer or wider.
03. One cream dot on a wine base
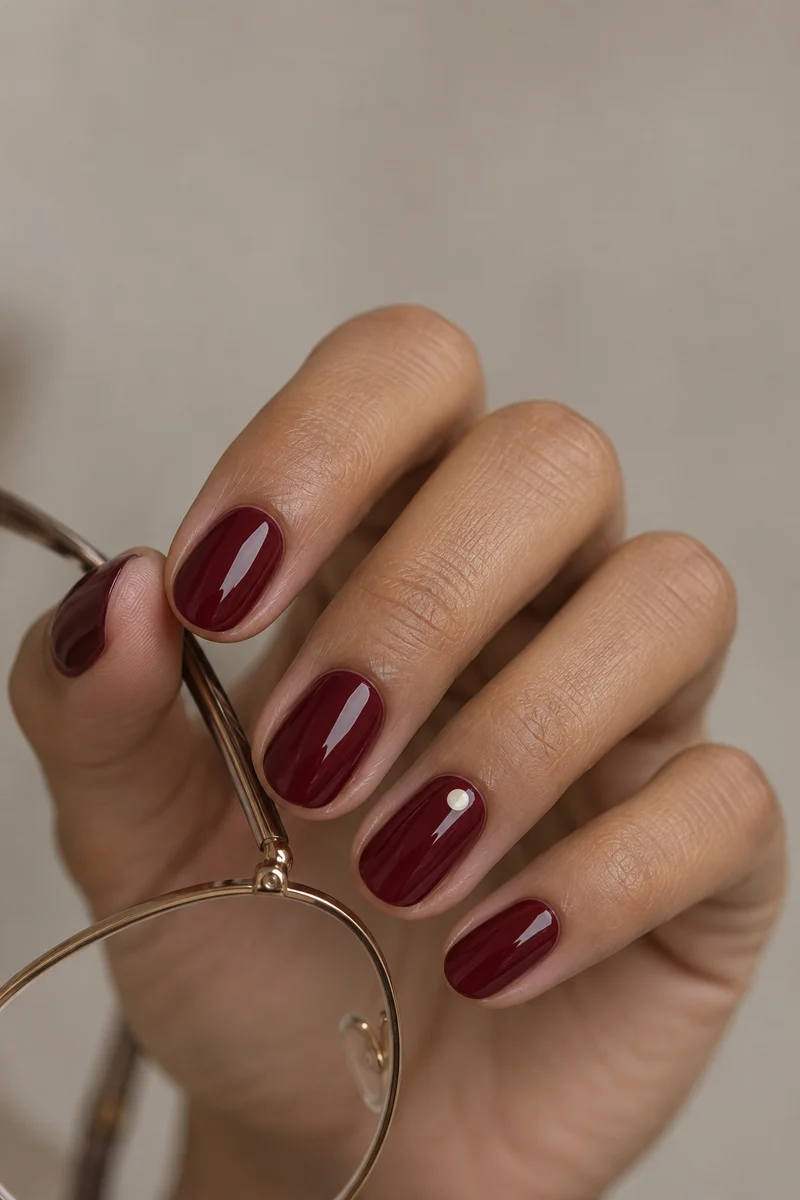
The design. Keep the glossy wine base from the classic, then add one small cream dot off-center toward the tip of the ring nail. This is a single focal point, distinct from the repeated polka-dot pattern in idea ten.
Wear it with. The restrained detail works with glasses, simple jewelry, or a workday outfit when you want a little nail art without a busy pattern.
Ask for. Specify one accent nail per hand and leave a visible margin of red around the dot. Keep it small relative to the nail width. A cream painted dot gives a quieter result than a large pearl or raised charm; decide which finish you want before the appointment.
04. A soft matte wine finish
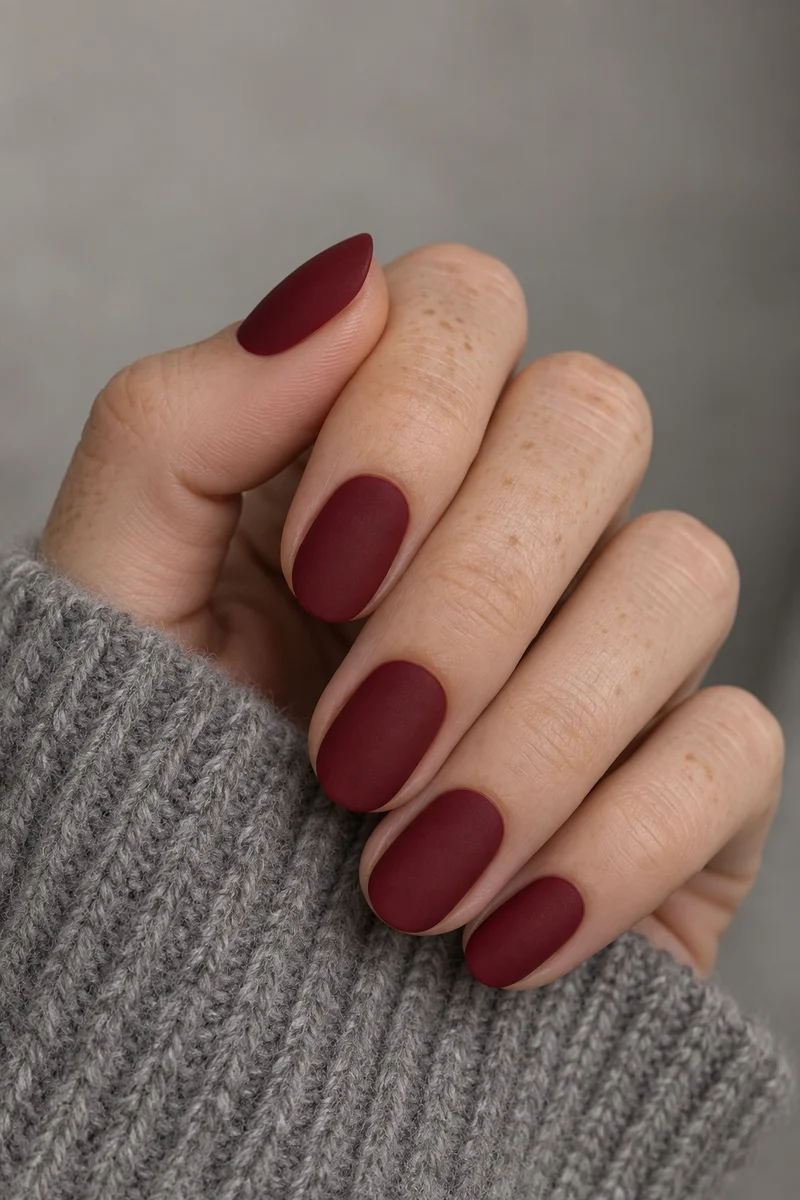
The design. A matte top surface removes the long bright reflections seen on the glossy classic. The color remains opaque wine, while the short-to-medium oval outline and velvety surface give it a quieter appearance.
Wear it with. A knit sleeve or a simple textured outfit supports the soft finish. Choose this direction when you like a deep red but prefer less shine.
Ask for. Request a uniform matte finish across the whole set, not a glossy tip over a matte base. Look at a finished swatch: top coat and lighting can change the apparent depth of the red. The goal is a smooth, diffuse surface rather than glitter or a pearly shimmer.
05. Deep wine with a softer berry rose
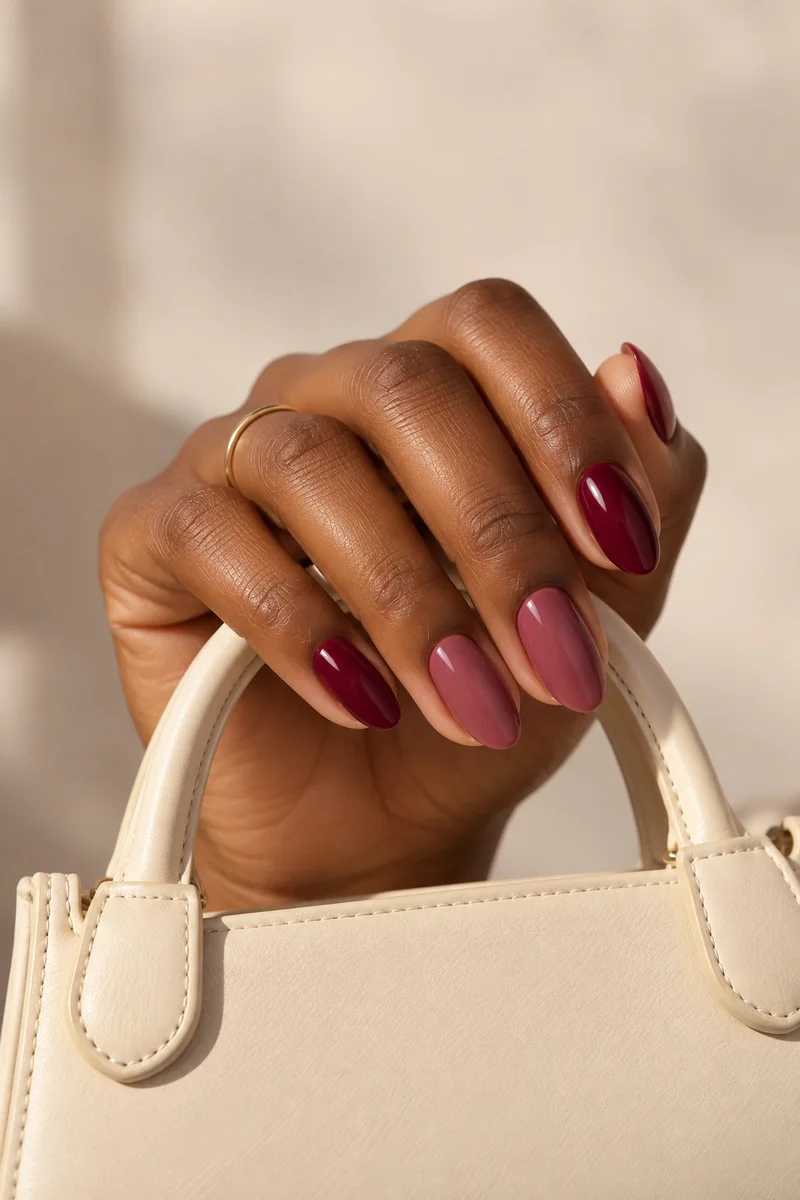
The design. Pair deep burgundy with a visibly lighter, muted berry rose. Unlike an ombré manicure, the change happens between nails, not across one nail. A consistent shape and glossy finish hold the pair together.
Wear it with. Use this when you want variation without drawn artwork. A plain small bag or minimal accessories leave the two-color rhythm easy to see.
Ask for. Put both swatches side by side in ordinary light. Choose enough contrast that the second shade stays visible, then agree which fingers get each color. You can alternate them or reserve berry for selected nails; write down the placement instead of leaving it to guesswork.
06. Short wine nails with a soft square edge
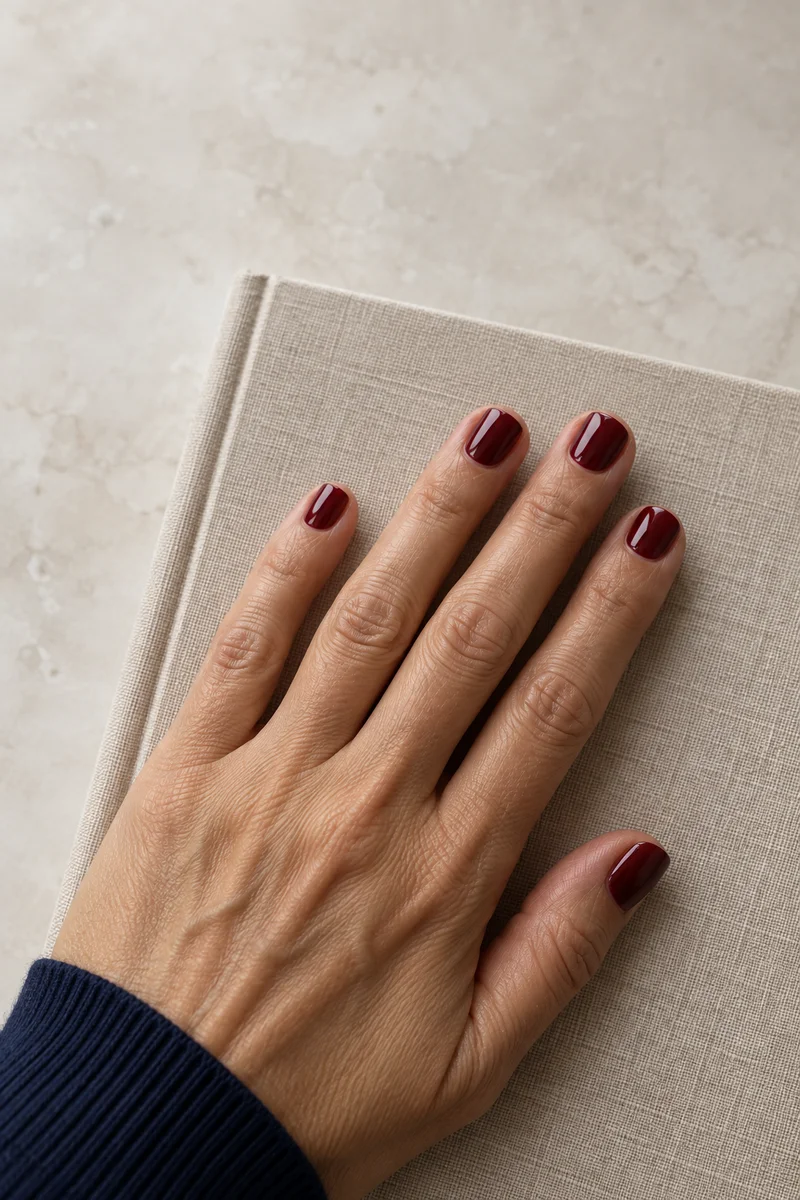
The design. This version is intentionally compact: the tip is almost straight, with rounded corners and only a small amount of nail extending beyond the fingertip. It is clearly shorter and less tapered than the almond classic.
Wear it with. A shirt cuff, a book, or everyday denim suits the clean outline. Choose it if you already prefer short nails and want the wine color to supply the impact.
Ask for. Show the free-edge length from the side as well as the top. Request a soft square rather than a sharp square or a fully rounded oval. Keep the coating glossy and opaque, with no art, so the shape remains the point of this option.
07. Sheer wine jelly nails
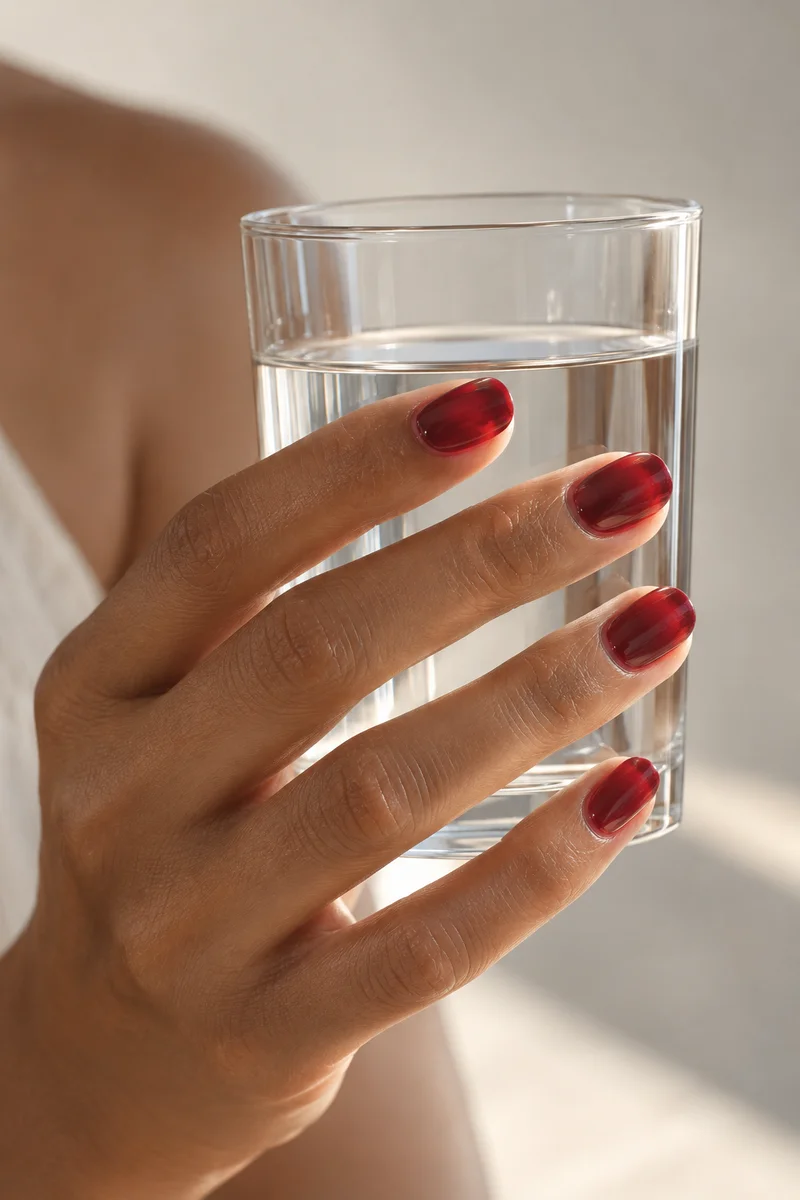
The design. Jelly keeps a glassy shine but allows light through the color. The free edge should look translucent rather than like a solid painted block; that is the distinction from ordinary glossy wine polish.
Wear it with. This is a softer way to wear a dark-red palette with a light shirt, bare jewelry, or daytime styling. Side light makes the transparent quality easier to judge.
Ask for. Request a sheer wine tint and decide how much natural nail you want visible. Compare a sample with fewer and more layers instead of choosing only by the bottle. Avoid an opaque underlayer if transparency is the goal; ask the artist to show the effect against the light.
08. A magnetic wine cat-eye
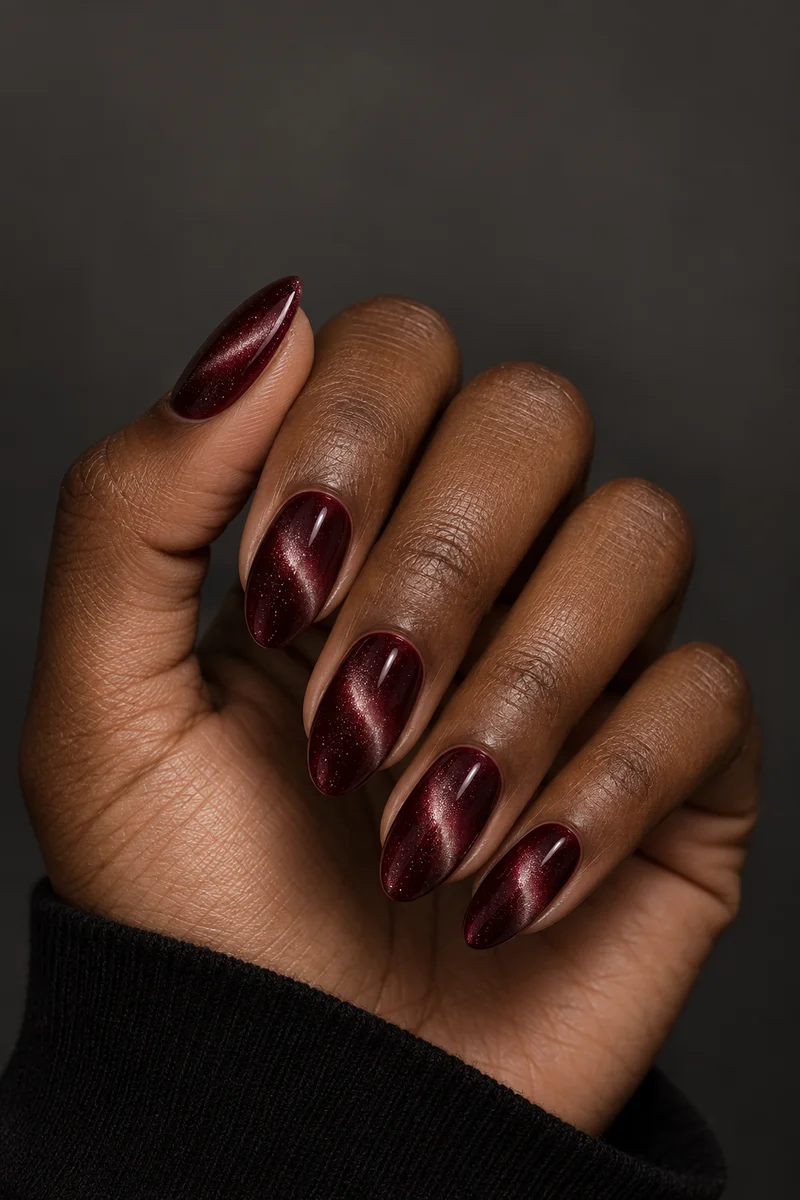
The design. The cat-eye look has a defined luminous band and fine magnetic shimmer suspended in a deep wine base. It adds an impression of depth; it is not the flat mirror reflection of the chrome design that follows.
Wear it with. Let the effect be the main detail for an evening look or an otherwise simple outfit. A plain dark sleeve keeps patterned fabric from competing with the stripe of light.
Ask for. Bring a reference for the band direction and width: a narrow diagonal beam and a broad velvet glow look different. Ask to see the finished swatch tilted under light. This still AI image illustrates one lighting angle; it cannot demonstrate the moving effect of a real magnetic manicure.
09. A mirror-like wine chrome finish
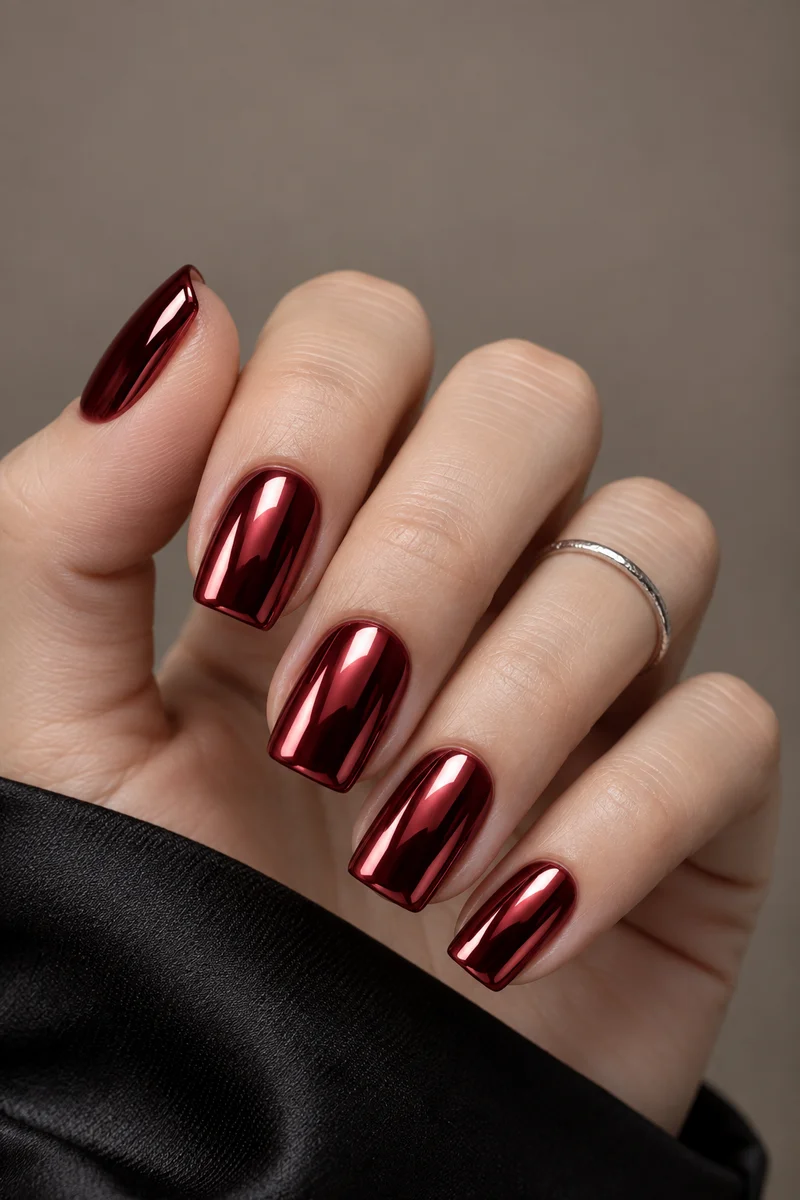
The design. Chrome turns the wine shade into a reflective metallic surface. Look for broad light-and-dark reflections across the nail, rather than the small white highlight of a regular glossy top coat or the internal band of cat-eye.
Wear it with. The finish pairs with a simple evening sleeve and restrained silver jewelry. Keep extra nail art minimal if the metallic surface is the feature you want to notice.
Ask for. Specify a burgundy metallic result, not a silver nail or a pale pearly glaze. Check the completed sample over the intended base color: the combination determines how red, dark, or mirror-like it looks. Keep the same finish on all nails for a deliberate set.
10. Burgundy nails with cream polka dots
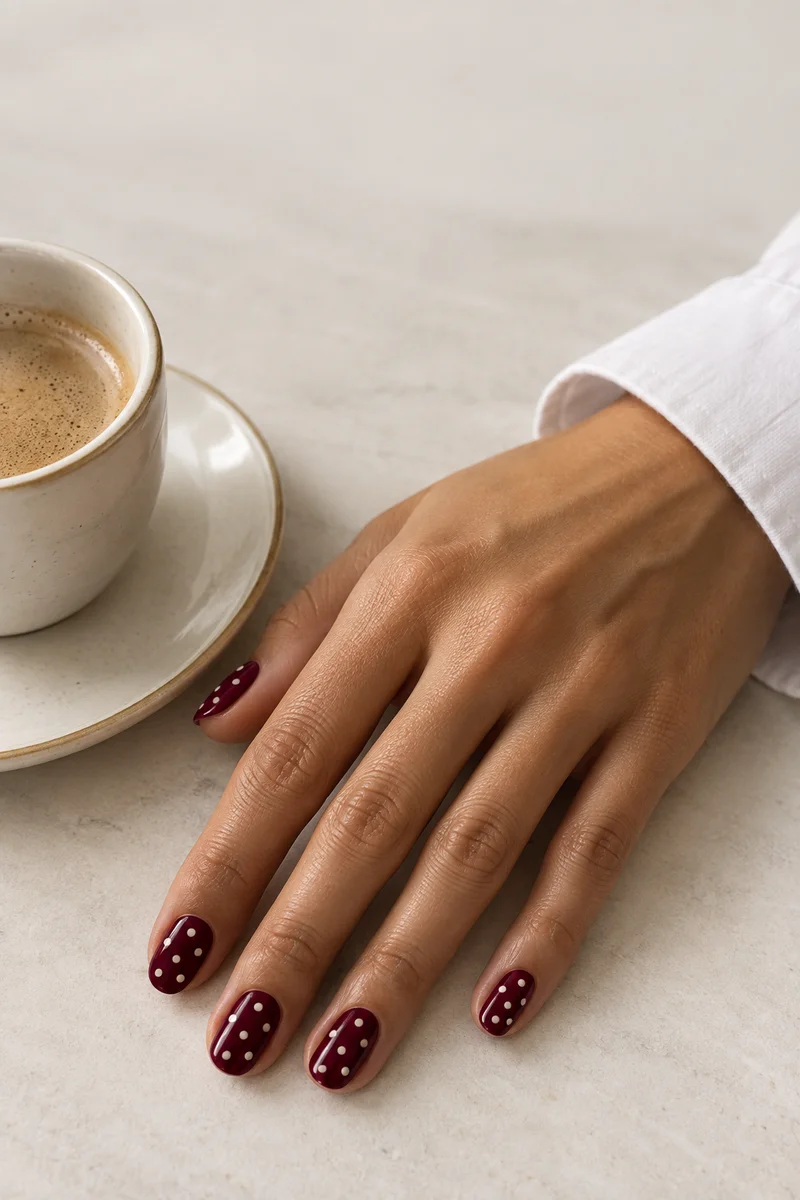
The design. Several small cream dots repeat across the burgundy nails. The light marks create a clear pattern even at a modest length; unlike idea three, the rhythm is spread across the set.
Wear it with. A plain cuff or a small café-table detail gives the pattern a playful context without adding another print. Choose this when you want the nail art to be visible at a glance.
Ask for. Agree on dot size, spacing, and whether every nail gets the pattern. Leave red space between dots so they do not merge into a pale patch. A shorter nail needs fewer dots, not smaller and smaller crowded marks. Keep the base opaque so the cream pattern reads clearly.
Make it yours
Choose the feature first: almond or short square for shape; gloss, matte, jelly, cat-eye, or chrome for finish; a French edge, one dot, two shades, or repeated dots for detail. Save one main reference and note the length, shade, finish, and finger placement you want. A real sample is the final check for color and special effects.
- Pick the main shape, finish, or pattern you want to repeat.
- Specify your preferred length separately from the photographed model.
- Check the actual polish sample in ordinary light.
- For dots or two colors, agree on size and placement before starting.
Keep this idea for later.
Bookmark this edit, or bring your favorite details to your next nail appointment.
Find your next nail idea ↓